Gluten Free Me

Welcome back to the blog! I guess I like to keep you all on your toes since these blogs are slightly less on schedule. But, I promise to stop monkeying around and blog more!

This week’s blog posting is about gluten in products such as moisturizers and shampoos. Unfortunately, it is a topic I found out from personal experience, but all the better to share with everyone.

Up first: Versed Moisturizer

Versed Dew Point Moisturizing Gel-Cream - 2 Fl Oz : Target

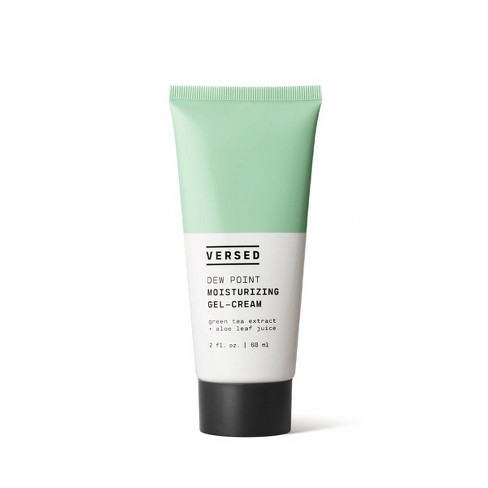
If you love Target as much as I do, you’ve probably seen this moisturizer. It sounds great for your skin, nothing bad inside. However, if you’re celiac or sensitive to gluten, the wheat-germ ingredient will not be good for you. There is such a high risk of ingestion with this product because it goes so close to your mouth. As a result, I was breaking out and I knew I was reacting to the gluten. If you’re looking for a good moisturizer, CeraVe’s moisturizers are widely available at most grocery stores and are great for your skin.

Next Up: Maui Moisture

Amazon.com : Maui Moisture Heal & Hydrate + Shea Butter Shampoo to Repair &  Deeply Moisturize Tight Curly Hair with Coconut & Macademia Oils, Vegan,  Silicone-, Paraben- & Sulfate-Free, 13 fl oz :

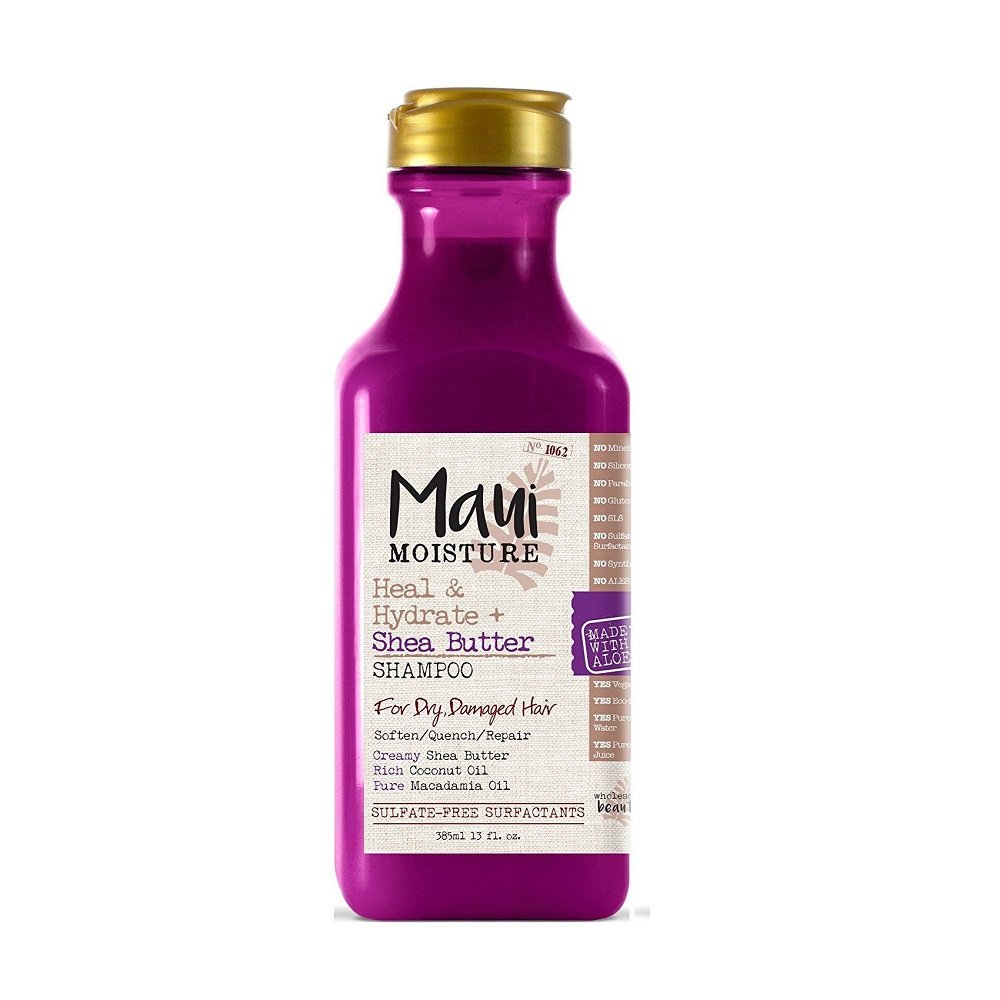
This is another target find, but it’s widely available in a variety of grocery stores. The ingredient that concerns me here is maltodextrin, which is derived from forms of gluten like wheat. Because it is not specified if the maltodextrin is from wheat or from corn, it is best to avoid it. Avoiding hair care products with gluten is a widely debated subject. Some believe that because it is not ingested, it should not cause issues because there is no evidence to show gluten is absorbed through the skin. However, others see a correlation between using gluten in hair products and thinning or unhealthy hair. The decision is up to you and most likely is also dependent on your sensitivity.

-Nicole

Gluten Free Me

Welcome back to the blog! Man, I’ve been so busy lately! School and work has filled most of my time, but I’m so excited to share this sugar cookie recipe in time for Halloween.

Ever since I became gluten free, I’ve been using “Gluten Free on a Shoestring” for all my recipes. Some of them are overly-complicated, but others like this cookie recipe is super easy and delicious!

All Cookies:

Sugar Cookie Recipe:

I cut mine into little pumpkins in celebration of fall, but you can use any shape as these cookies are very sturdy and meant for cutouts.

As for the frosting, I just found a generic frosting recipe off of google, but you could also use the frosting recipe attached to the sugar cookie recipe. I recommend letting both the dough and the frosting chill a bit in the fridge, which held better for me when I made them. If you store the cookies in layers with wax paper in between each layer, you won’t ruin the frosting.

Frosting step-by-step:

Start with a good amount of frosting; it’s easier to take it off as you go rather than trying to put more.
Scrape the frosting to all the edges of the cookie
Use an off-set spatula or a butter knife to spread the frosting out from the middle to the edges; scrape excess back into the bowl.

That’s all from me! Happy baking 🙂

-Nicole

Gluten Free Me

Welcome back to the blog! This week’s blog is a combination of gluten free diets at restaurants, as well as at home.

First up, we have a Mediterranean chicken pasta from The Landmark restaurant in Old Orchard Beach, Maine. The host who showed us to our seats was kind enough to walk me through the entire menu, pointing out each gluten free option. I’ve never seen restaurants do that, so I was pleasantly surprised. I was slightly disappointed that there wasn’t a separate gluten free menu, but there were still a lot of gluten free options. If you like seafood, you would like the food offered here. When ordering pasta, it is always important to keep cross-contamination in mind. If you’ve ever made pasta at home, you would be familiar with the starch (and gluten) that accumulates at the bottom of the pot once you’ve drained the pasta water. Depending on how well the restaurants clean their pots, this may be a problem. I kept thinking about this during the meal, but it was so nice to dine out and enjoy a gluten free meal.

Next up is a homemade charcuterie board. You may be familiar with these if you’ve seen them on social media, but if not, they are fun spreads full of options for snacking. I found that it was a great way to eat my gluten free snacks without it seeming too random. Usually, these types of spreads have meat (charcuterie in french is a store that sells deli meats and other types of cold cuts). However, many processed meats do contain gluten, so I used fruit, hummus, a variety of chips, cheese, and nuts. It is interesting to make your own combinations from the foods you put on your board, whether you choose sweet, savory, or both. To make your own, use crackers, cheese, fruit and spreads as the basics and add snacks and foods to fill the board. Using small bowls or ramekins is a great way to boost its presentation.

Happy snacking!

-Nicole

Gluten Free Me

Welcome back to the blog! July was very busy for me, but blogging is back on track. This week’s blog is a recipe for gluten free eggplant parm.

I might’ve lied when I said there was a recipe, because it’s more like a general idea. I was in the mood for eggplant parm the other night, but my cooking partner got distracted and I made things up as I went.

Ingredients:

-2 eggplants, peeled and cut

-Salt

-Tomato sauce

-Parmesan cheese

-Fresh basil

Directions:

Peel your eggplants, then cut into thin circles. Lay them out on paper towels and sprinkle with salt to dry them out.

After they’ve sat out for a few minutes, lightly cover the bottom of a baking dish with olive oil, then tomato sauce. Lay your eggplant on top of this layer and add more sauce and cheese. It is best to do thin layers to prevent a soggy final product.

Repeat until you have used all of your eggplant. Top with extra Parmesan and bake at 350 for 45 min. Top with basil.

This is not the traditional eggplant with battered or breaded layers, but you could use this recipe as a backbone and bread the eggplant with gluten free breadcrumbs and an eggwash. Bake them for about 10 minutes, then continue on with the layers in this recipe. You could also top this recipe with breadcrumbs to create a crunchier final product.

This is what it should resemble before baking
This goes great with pasta!

Happy cooking!

-Nicole

Gluten Free Me

Welcome back to the blog! This week’s blog is packed full of fun recipes.

Recipe #1: Homemade Mac and Cheese

This is the first recipe that I’ve come up with on my own and I’m proud to say it’s delicious!

Ingredients:

-1/2 cup milk (I used unsweetened almond milk)

-1 cup shredded cheese (I recommend Cabot’s Garlic and Dill White Cheddar), plus more for topping

-1 TBS cornstarch, mixed with 1 TBS water

-8-12 oz. pasta, depending on how cheesy you want it to be

*Optional: 1 tsp bacon fat

Directions:

-Cook pasta according to box directions

-Bring milk and bacon fat to a boil

-Once boiling, add cornstarch mix in thirds, whisking well after each addition

-Once the mixture has thickened, take off the heat and add your cheese in thirds, whisking well after each addition.

-Drain pasta and add to cheese mixture

-Top with shredded cheese

Recipe #2: Vegan Lime Cupcakes

LINK HERE

I used oat milk as a substitution and I recommend baking them for more than 25 minutes, perhaps 26-28 minutes instead. The frosting is also a bit thick, so adding 1-2 TBS of water helps.

Recipe #3: Homemade Caramel Sauce

I love coffee, especially caramel coffee, so I had to try this! It’s so tasty!

LINK HERE

This is for a dairy free caramel sauce, but you could use any type of creamer. My creamer is naturally sweet, so I used 1/3 cup of white sugar instead of 1/2 cup. Other than that, I did not make changes to the recipe.

To store this, I poured it into a mason jar. This can stay at room temperature or in the fridge.

Happy baking!

-Nicole

Gluten Free Me

Welcome back to the blog! This week’s blog is a healthy, protein filled snack.

Have you ever gone to the grocery store and really wanted something, but it has gluten? All the time! Well, I was at the store the other day and was pining over the Skippy PB Bites, but I knew they were not gluten free. So, I went to Skippy’s website and recreated them. On the website, there’s also less ingredients and unnecessary add-ins, so it was a win-win!

Link here:

It is a very straightforward and easy recipe. I used dairy free chocolate chips as my add-in because I didn’t have too much on hand. They were still really good and very filling.

For protein powder, I used “Garden of Life” raw organic fit protein powder (Vanilla). The protein powder you use makes or breaks this recipe because it is pretty prominent in the taste and texture.

I used this, but in vanilla (chocolate and pb is great too)

I hope you enjoyed this recipe! Happy baking!

-Nicole

Gluten Free Me

Welcome back to the blog! This week’s blog is all about homemade chocolate! It sounds hard, but if you have a food processor, it does all the work for you.

Long story short, I bought 2 pounds of cocoa nibs on Amazon, thinking they were dairy free chocolate pieces – I was wrong. They were super tart, hard pieces of cocoa instead. If you keep them in this form, they go great with the Trader Joe’s acai bowls. But, if you can’t figure out how to use the whole two pounds, homemade chocolate is the way to go.

I have to warn you, this random recipe I found on google did not warn me that this chocolate would NOT taste like real chocolate – probably because there was no milk. As a result, the chocolate is a little drier than you might expect. With that being said, if you throw them into your favorite chocolate chip cookie recipe, you can’t tell the difference!

Recipe:

The measurements depend on the percent you are looking for. I did 70% chocolate and 30% sugar (your two ingredients) and it made a great dark chocolate mix. Depending on the total amount you want ( I did 500 mL in a Pyrex) you take that percentage. EX: 70% of 500 is 350. Then, you add 150 sugar. The steps are simple: You put everything into a food processor or a blender and keep mixing it until it turns into a liquid. Then, let it cool. The reasoning is that the movement creates heat, and slowly melts the cocoa nibs.

Once you have your cooled chocolate, chop it up and substitute it in any cookie recipe, or use it as a topping! I recommend letting it cool in a rather shallow container because it is nearly impossible to cut when it is thick, trust me. One other note: if you sprinkle some coarse sea salt over the chocolate before it cools, it tastes amazing. Happy baking!

-Nicole

Gluten Free Me

Welcome back to the blog! This week’s post is a recipe for homemade cinnamon rolls. This was my first time making these, and they were absolutely amazing! Gluten free, dairy free alternative to Pillsbury cinnamon rolls.

Yum!

The recipe is from The Kitchn, not my own. I will link the recipe below:

Link:

The substitutions that I did were with the milk and butter. I used oat milk for a non-dairy alternative and used vegan butter as my other alternative.

Guess what?! This recipe calls for Bob’s Red Mill 1:1 baking flour, mentioned in the blog. Truly a versatile flour.

This recipe does a great job of explaining everything when it comes to the steps, or the best ways to use the ingredients. Happy baking!

-Nicole

Gluten Free Me

Welcome back to the blog! This week’s blog is a fun and simple baking idea to keep you occupied at home 🙂

First up: Homemade granola

Recipe:
2 cups gluten free oats

1/4 cup butter or coconut oil

1/4 cup honey

1/2 tsp vanilla extract *

2 tsp cinnamon

1/2 c dried fruit/topping of your choice

Optional: 3 tbs brown sugar

Melt together butter and honey; Mix together oats, vanilla and cinnamon. Combine and add toppings. Sprinkle brown sugar on top and bake at 300 for 30 min, stirring halfway.

*make sure vanilla is gluten free

This can be eaten by itself (because it’s delicious!), with a smoothie bowl or with yogurt. If you want to make this with a smoothie bowl, just use your favorite smoothie recipe but reduce the liquid in the smoothie to make it thicker.

Goes great with fresh fruit or a smoothie bowl

Next up: Tacos!

Definitely not a baked good, but such a fun food to make in quarantine! Most hard shells (made from corn) are gluten free, as well as soft tortillas make from rice flours, etc. What I love about tacos is that you can put almost anything it them! Chicken tacos are my favorite.

Corn, tomato, chicken, lettuce and lime juice!

Stay safe everyone! See you next week.

-Nicole

Gluten Free Me

Welcome back to the blog! This week’s blog is a recipe for gluten free chocolate cake. I was in the mood for a chocolate cake last week, so I went to Google in hopes of finding a quick recipe for a great cake. Gluten free cakes can be tough, especially during a quarantine, because their recipes are specific to a certain flour. In this case, it is the Bob’s Red Mill 1:1 Baking Flour from my blog, so it worked out perfectly.

Here’s the recipe:

For the Cake:

1.5 C granulated sugar

2 C all-purpose flour (gluten free of course)

3/4 C unsweetened cocoa powder

1.5 tsp baking powder

1.5 tsp baking soda

1 tsp salt

2 large eggs at room temp.

1 C milk

1/2 C vegetable oil, or another type of oil

1.5 tsp vanilla extract*

3/4 C boiling water**

*Check your vanilla carefully because some have gluten in it

**Boiling water is used to “activate the cocoa” – this is not my own recipe but I liked the way it turned out.

For the Frosting:

1/2 C butter, softened

1.5 tsp vanilla extract

1/2 C unsweetened cocoa powder

4.5 C powdered sugar

1/4 C milk***

***You probably won’t end up using all of your milk, so add it slowly until you reach your preferred consistency.

Directions:

  1. Preheat oven to 350°F; Grease two 8-inch cake pans, then set aside.
  2. In a large mixing bowl, stir together sugar, flour, cocoa, baking powder, baking soda, and salt until there are no visible clumps.
  3. Add eggs, milk, oil, and vanilla. Beat with a mixer on medium speed for two minutes.
  4. Stir in boiling water.
  5. Pour batter evenly into cake pans. Bake for 35 to 38 minutes, or until a toothpick inserted in the center comes out clean.
  6. Remove from oven and let cool in the pan for 5 minutes, then remove from pan and let cool on a wire rack.
  7. Frosting: In a medium mixing bowl, beat butter and vanilla until smooth and creamy. Add cocoa powder and beat until combined. Gradually add powdered sugar, one cup at a time. Slowly beat in milk. Beat in additional milk if needed, to obtain desired consistency.

Store in an airtight container at room temperature for 3 days or in the refrigerator for up to a week.

Here’s how my cake turned out!

Source: Gluten Free Palate has some great recipes! I highly recommend checking out their site for more ideas.

If you are anything like me and don’t have a lot of cake pans lying around, you can halve the recipe to make one sheet of cake. Once it has cooled completely on a wire rack, cut down the middle and stack the two pieces. It’s still a 2-layer cake, but smaller!

Don’t forget to subscribe to the blog! Enjoy your weekend and stay safe.

-Nicole

Design a site like this with WordPress.com
Get started